The Finished Rustic Steampunk/Industrial table

The table's finished and been delivered to a very happy client (thankfully!). Here are a few shots of the final table. The "T" fittings on the legs were done purposely. There are 2" long fittings that go on to turn it into a coffee table or full height table within the time it takes to spin off the previous legs. They've asked for matching chairs and a bench now.


Some of the fittings after a good bronze spray painting.

 It in the light to show some of the boards and finish.

And of course, since it was around the holidays, a little panache for the delivery.

Some of the details. I desperately tried to keep the blocks that had the company's branding from the original pallets. The idea was to make it feel as though it were made from spare parts around an old factory.

The Rustic Steampunk table (work in progress)

This is about 1 and a half pallets worth of wood with steel plumbing parts. The idea was to do some of the popular pallet wood projects that wasn't overly worked or painted. But used all the natural weathering and character of the wood itself. Rustic Steampunk was the direction I was aiming for. The plan is to eventually woodburn in a design, spray paint the pipes and finish it in a bit of a lacquer finish. Lots of chunky bolts.

First for the design I settled on. Forgive the terrible changing perspectives, it's only for showing the overall idea (and was done on a bus commute).


The workspace (my kitchen/livingroom/computer room) and all the pallets pulled apart. I've saved a good chunk of all the old (rusty) nails for later. A lot of the wood was warped, bent and different thicknesses.


I planed the backs of the wood slats to try and make all the different thicknesses as flush throughout. Then started gluing and clamping each strip down. 
  (that is indeed Top Gear on the computer screen)
(and that is indeed my cat after a romp in all the sawdust, as well as the crucial Canadian handyman problem solving lubricant... an empty whiskey glass!)

The final table top configuration. The big slats are ordered (to keep all the barrel stains) while the thinner slats are offset. 

Not the final assembly, more of a rough in to check that all my initial plan measurements were accurate. SOMEHOW... miraculously, they were. Despite the LARGE quantities of the Canadian problem solving lubricant.

Those original rusted nails I kept from the pallet dis-assembly have been put back into the wood to keep it's character. I didn't have quite enough of the original nails, so I grabbed some spare ones and left them outside in the rain for a week.

The Burnt Behemoth: Round 2

The top floor of the new (once crispy) project.

The living room. Again, continuous oak hardwood throughout. Ceiling's been raised about 3 feet to give it a feeling of more space. French doors into the bedrooms.


The new kitchen space. Once again, new windows, open concept, etc.


A closer shot of the kitchen. Didn't have much space to work with kitchen wise for counterspace. We did what we could. Reused what was left of another project's unused cupboards and another (luckily) identical spare couple of cupboards we found at habitat or on kijjijiijiiijijijiji (i'm not even going to try rewriting that)

The new bathroom space. We changed the direction of the tub to fit the new space configuration (to add a closet into the 2nd bedroom). Also grabbed some of the unused space from the master bedroom closet to make an inset linen closet for the bathroom.


We love the hotel style convex shower rods. No sticky shower curtains. Don't have to keep the elbows in during the shower. Gives a surprising amount of space inside. As well, the window is half in the shower space and half in the rest of the space. It was fun to tile and finish as if it were a room meant for Harvey Dent!


Last but not least, the master bedroom. This one turned out quite well. Actually the selling feature for this space. It's huge bedroom with TONNNSS of closet space. We actually pushed the vertical support walls back several feet to get a lot more room. Makes a king sized bed look like a queen.


The Burnt Behemoth

A few projects later was a legal triplex that had been in a fire on the top floor. Not to mention it had 2.4 tons worth of radiators (half of those being on the top floor). So far, the top 2 floors have been finished. Shopping for rental houses with multiple floors is fun: "Yes, hello. I'd like 3 of everything please!"

To start off, a small snippet of the damage from the outside. You can see all the patched up windows and the patched up roof holes from where the fire broke through or the fire brigade broke through to put it out. A daunting start!


Walking into the front, we have the main floor living room where we removed and replaced walls with full structure beams. This gave the living space an entirely open flow between the living room, dining room and kitchen. Behind the scenes, EVERY nook and cranny's been jammed with Roxul insulation, even between the floors for energy conservation and sound dampening.

The otherside view of the open living space. A large 4x6 window absolutely floods the living room with natural light. The window's tinted so you can't see in from outside. Unfortunately, no shots of the old framing before we changed around the configuration.

Getting closer into the kitchen. Showroom cabinets that had to be sold to make room for the new models, cleverly retrofitted by the "boss" into the new kitchen space. Again... lots of natural light splashing onto the "elegant white" cupboards and tile floors.

A quick shot of one of the bedrooms. Pretty simple really. New pvc window. Huge closet space. Another clever bit of design that the old man came up with was to put the new HVAC (one for each floor) actually hidden deep into closets like these. With the brand new, quiet HVAC systems combined with all the new insulation, you could hear trappist monks more loudly.

Some reframing created a slightly larger bathroom (and larger master bedroom closet). We've had significant positive feedback from the people living in the spaces with the bathroom designs that we only modify it to fit the different spaces. Bathrooms and kitchens are always the selling points.

Chapter 3: Culmination of Skills

After my brother and I have had over a year's experience learning tips, tricks and have settled into our new roles, we were given a chance at tackling another "wartime" house. It was completely gutted and stripped on the inside when we got in. This one has had some of the most love and the most redesign work than almost all the work we've done so far. I actually lived in this house for a short period of time and It was a VERY comfortable place to live. It felt very complete and very tight in completion.

to start off... the front!


The most fun was using the antennae as a ladder to the roof and trying to stand on the roof with a fresh layer of dew on the slick plywood. Also worked with a fantastic new siding product called "Hardie Board".

The back

The deck was enjoyably done in a day! 

Sorry for the blurry before photos. Not my fault! Here's the new living room. Solid oak mocha floors. The one most impressive thing about this living, that can't be seen, is the raised cathedral ceiling. 12 ft high ceiling. It feels very breatheable and spacious.


Entrance into the bedrooms and bathroom. Decided to create a triptych style setup as opposed to the weird old setups these houses had that strangled room from the bathroom and the bedrooms.


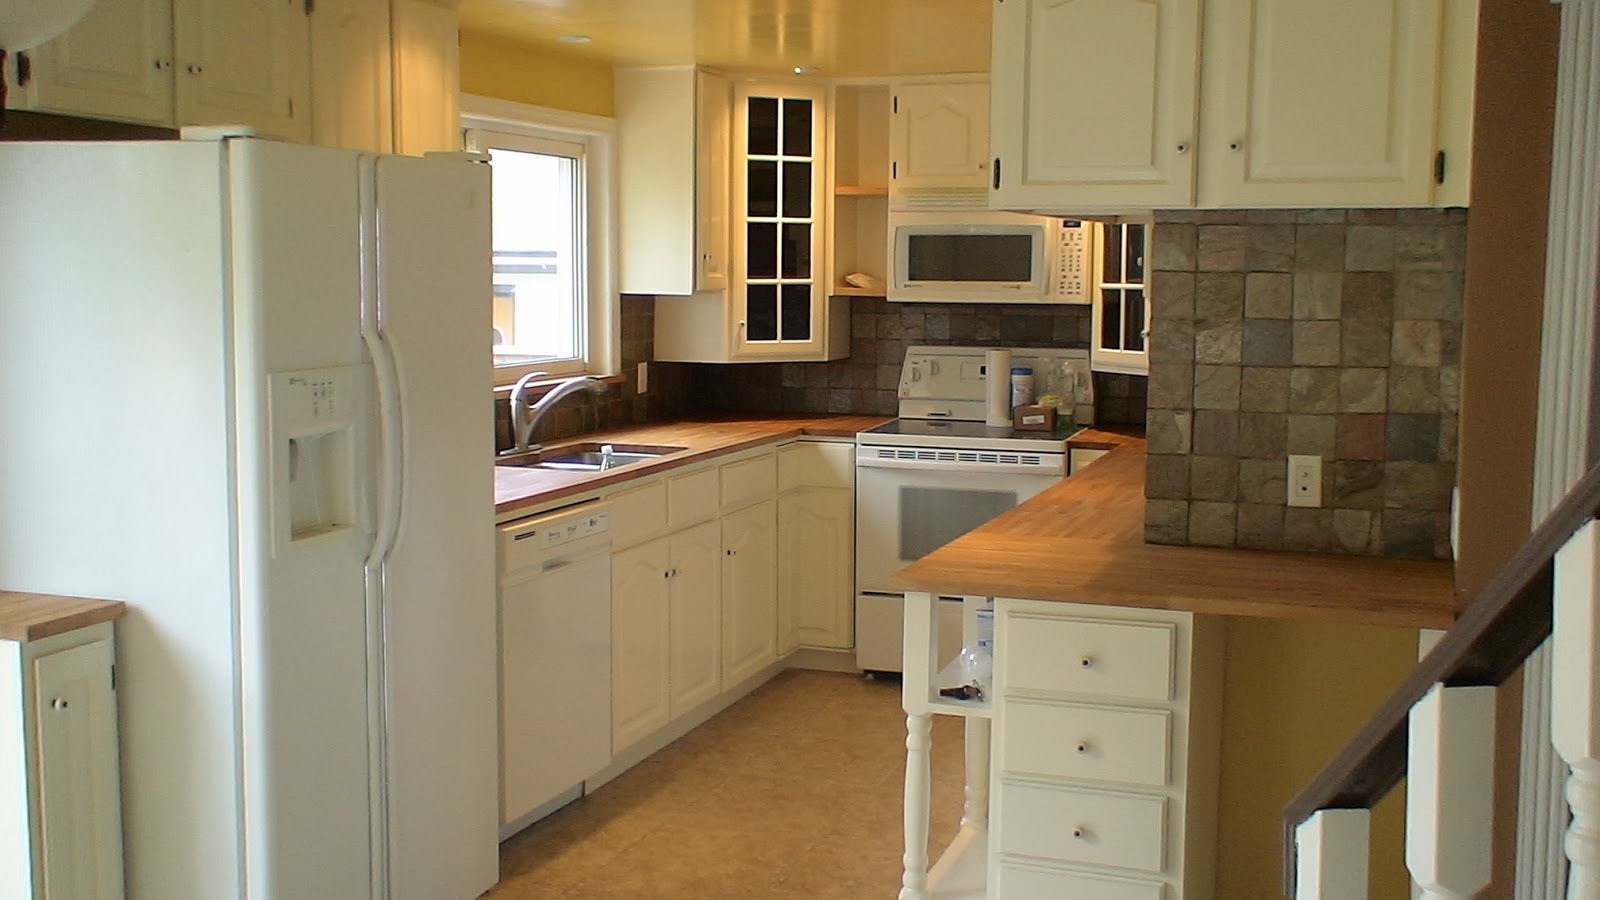
The new kitchen setup. Again, retrofitted used cupboards into the setup. Completely sanded down hardwood cupboards and restained to fit with the dark vs light motif of the hardwood flooring. Custom backsplash to accent the stainless steel applicances. Also, in an attempt to try something new, we used large porcelain tiles as the counter tops. Also adding a small breakfast counter on the other side for a little extra countertop space.

The most interesting part of that is we used an industrial strength chemical glue that has about 15 mins of working time after it's been mixed for the porcelain counter. As I was using the drill with the mixing bit... the glue suddenly firmed up, grabbed the mixing bit and spun the pail around shooting industrial strength glue all over the brand new oak flooring. It was a panicked race against the clock to clean up the mess AND use the remainder of the glue for the counter tops. Glad to say we got the tiles down on the counter and the floor was cleaned up before it solidified. Quite a hilarious and ridiculous renovation screw up!


The new bathroom is the best room in the house. We made it bigger, added a DEEP soaker tub with accent tiles that wrap all the way to the sink. It has a great, comfortable feeling, especially with the "cup of cocoa" Behr paint. Go ahead and take a bubble bath and relax!


Home Reno: The Sophmore album

Now that I've got my teeth wet and feel comfortable with all the tools, it's time to put a stamp on this project. This was a storey and a half. With half the basement finished as well. The real challenge on this house was the top half storey, all the angled "A" walls and lots of hunching over. No before photos unfortunately. This was twice the project size and I made the mistake of saying I'd plaster the entire house. I've learned my lesson!

The front living room. My dad had been hoarding those columns (for years) which were a little broken but with a little refurbishing and some reshaping, it turned out quite nicely for the entrance. The light comes in beautifully around midday.


Bathroom designed and built entirely by the old man. Getting the used (but in great shape) shower form in that space was a special project, especially when we had to pull it back out and shave about a half inch off the frame to get it to fit.

The fairly spacious (with lots of closet space) Main bedroom.


My favourite part of this house was definitely the galley kitchen. Tons of light splashes on the country yellow walls through a large sink window and sliding back door. Used hardwood cupboards, repurposed to fit this setup. Every nook and cranny of them were sanded down and repainted a nice elegant white with full Butcherblock counter top with undermounted sink. It's got a nice feel to cook a great large meal.


The back deck that comes off the kitchen. Refaced this deck  while it was (somehow) both raining and snowing. Suffice it to say, I slipped while standing on the joists that are about 3 feet off the ground and slammed my plums. It was a commitment to check the structural strength of the deck!


The two top half storey bedrooms. My dad did a great job re purposing the closet doors on this level that came from the original closet from the entrance way.